 View Gallery
1 photo
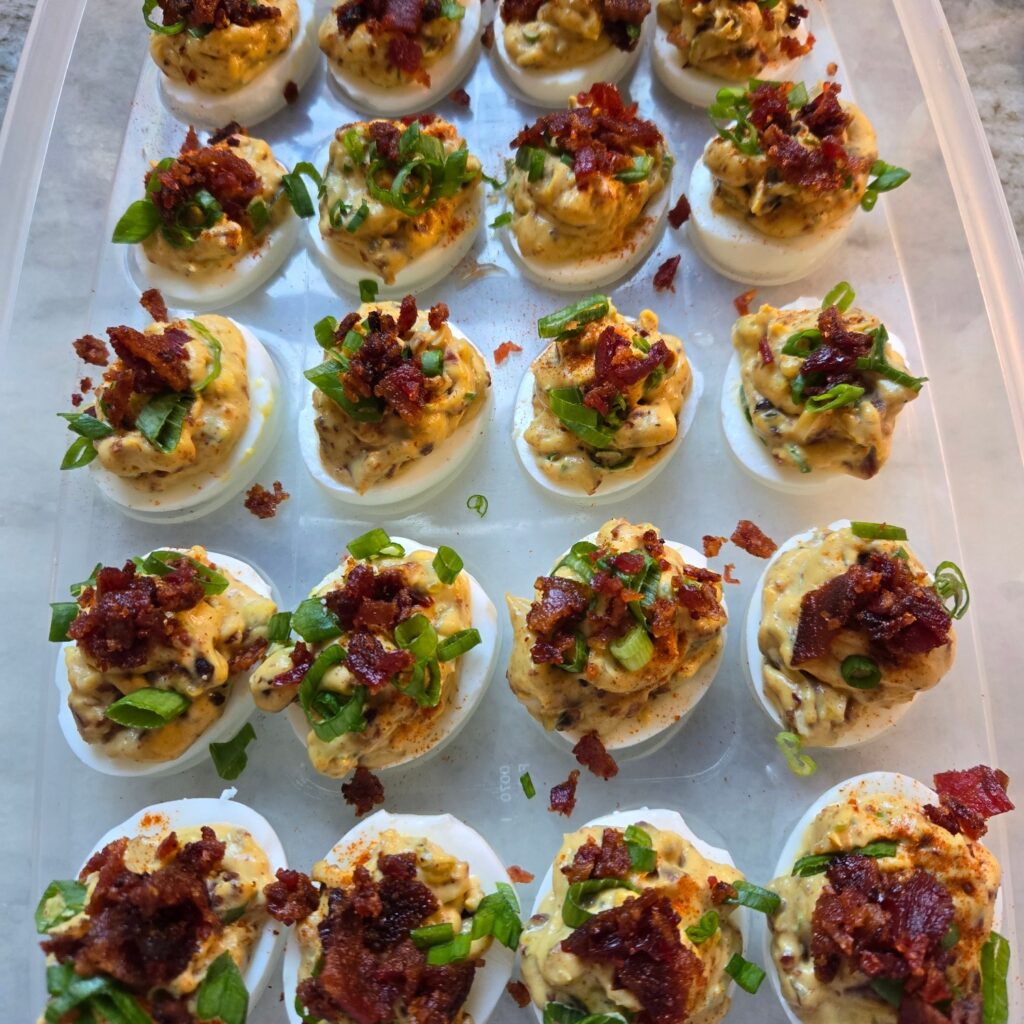
Sweet, smoky, creamy, and just the right kick – these deviled eggs bring the party to the table. Whether you’re feeding a crowd or just sneaking one more bite, this twist on a classic never misses. They should be called Heavenly Eggs.

Candied Bacon Deviled Eggs
Description
Sweet, smoky, creamy, and just the right kick - these deviled eggs bring the party to the table. Whether you're feeding a crowd or just sneaking one more bite, this twist on a classic never misses. They should be called Heavenly Eggs.
Candied Bacon Deviled Eggs
For the Candied Bacon
Instructions
-
1. Boil & Peel the Eggs
I use a cheap little egg cooker and then immediately transfer to an ice bath for at least a few minutes.
If you do not have an egg cooker, put eggs in a saucepan and cover with water (at least an inch above the eggs). Bring to a rolling boil, remove from heat and cover. I recommend leaving them rest for 10-12 minutes, then remove with a slotted spoon and put in an ice bath for a few minutes to stop the eggs from cooking and to help with an easier peeling process.
-
Make Candied Bacon
Preheat oven to 375°F. Line a baking sheet with parchment paper (you can also use a wire wrack if you would like). Sprinkle with brown sugar and a touch of cayenne. Bake 15–20 minutes or until crispy and caramelized. Cool and chop finely.
-
Prep the Filling
Slice peeled eggs in half and scoop out the yolks into a bowl. Mash yolks with a fork. Then add mayo, relish, Dijon, horseradish (if using), 3/4 of your green onion and candied bacon (reserving the remainder for garnish), apple cider vinegar, Worcestershire, dill, onion powder, and salt & pepper. Mix until smooth and creamy.
-
Fill the Eggs
Spoon or pipe the filling into egg whites. I like to place the filling in a Ziploc bag and cut the corner off.
-
Garnish & Serve
Top each with chopped candied bacon and green onion and then a sprinkle of paprika if you’re feelin’ fancy. Chill before serving — or enjoy right away if you just can’t wait.
Flavor Tip: These taste even better after a few hours in the fridge. Make ’em ahead and let that flavor develop!


